Cooking Classes

27.2.10

Making Your Own Candied Ginger and the Winner of my Giveaway

Thank you to everyone who threw their name in the hat for my great Canadian giveaway!  I had not thought about it before but started to wonder about strategy.  Should one reply first, in the middle or at the end of the contest.  Who would have the best chance?  Never in my wildest dreams would I have thought that www.random.org would have chosen #1!  Yes, #1 won!  Andrea of The Kitchen Witch, you have won my gift basket!


I have been intrigued by candying fruit for the past few years.  My current foray into this interest of mine is to make my own candied ginger.

This has intimidated me for some reason.  Perhaps it is because ginger is such a woody, tough root.  I cannot visualize the transformation into a chewy, spicy sweet.  That has all changed now!

I made candied ginger yesterday and could not be more pleased with the outcome.  I must add that I
also attempted to make this earlier in the week and that recipe was a dismal failure.

There are many instructions for making this.  The first method that I tried involved using the slow cooker.  The directions told me to make a syrup, add a little glucose and cook on low in the slow cooker for 12 hours.  I woke up to the odour of burnt sugar and ginger.  The little pieces of ginger were charred beyond recognition.  I spent the rest of the day carefully cleaning the porcelain insert of the slow cooker.

Undaunted and with much more care, I tried again.

This is the method that worked for me:

Candied Ginger

1.  Peel and thinly slice fresh gingerroot.
2.  Place the sliced ginger in a heavy saucepan.
3.  Cover with water.
4.  Cook gently until tender, 30-45 minutes
5.  Drain off water.
6.  Weigh the cooked ginger and measure an equal amount of sugar.
7.  Return the ginger to the saucepan.  Add the sugar and 1/4 c water.
8.  Bring to a boil and cook until the sugar has dissolved.
9.  Reduce the heat and cook until the ginger is transparent and liquid has almost evaporated.  This make take up to 2 hours to reach the state of tenderness and transparencey that you desire.  Add more water as necessary.
10. When the ginger has finished cooking, drain on cooling racks.
11.  When cooled and dry, toss with sugar.
12.  Store in airtight container.

tiramisu


The February 2010 Daring Bakers’ challenge was hosted by Aparna of My Diverse Kitchen and Deeba of Passionate About Baking. They chose Tiramisu as the challenge for the month. Their challenge recipe is based on recipes from The Washington Post, Cordon Bleu at Home and Baking Obsession. 

This is a picture of my end product.  Not elegant in the least but tasty.  I would definitely freeze it before cutting if I was just making it in a square pan.  The filling was quite soft.

I have included all of the recipes from The Daring Bakers because I thought they were interesting.  Enjoy! 

 This divine Italian dessert translates to mean ‘pick me up’, supposedly referring to the ‘kick’ provided by the strong coffee, sugar and alcohol in it!
On the other hand, a slight mistake in spelling it as "Tiramuso" could end up meaning that you were "pulling a sulky face"! Classic tiramisu is made of alternate layers of espresso soaked ladyfinger biscuits and a cream made from mascarpone cheese and zabaglione (an egg custard).

The perfect Tiramisu is a balance of flavors of a sweet zabaglione, strong coffee, marsala wine, creamy mascarpone cheese and the dusting of unsweetened cocoa.

So when, where and how was tiramisu born?
Tiramisu is said to have its origins in Treviso (Italy), and there are quite a few stories about how it came to be created.
One story traces the tiramisu as far back as the Renaissance claiming that it was first made in honour of the visit of Grand Duke Cosimo di Medici to Tuscany. Yet another one points to the tiramisu being an adaptation of the "Zuppa Inglese" referring to the sponge cake and cream layered English Trifle.
However, experts in this area generally agree that the tiramisu as we know it today, was born in the ‘70s.

Some believe that the Tiramisu was created in the the Le Beccherie (a restaurant in Treviso). Ohters suggest that Tiramisu was first made in 1971 by an Italian baker named Carminantonio Iannaccone in a small bakery in Treviso, Italy.


RECIPE SOURCE:
Mascarpone Cheese – Vera’s Recipe (Baking Obsession) for Homemade Mascarpone Cheese.
Savoiardi/ Ladyfinger Biscuits – Recipe from Cordon Bleu At Home
Tiramisu – Carminantonio's Tiramisu from The Washington Post, July 11 2007


NOTES/ TIPS:
  1. If you cannot find Marsala, port wine is considered a good substitute.
  2. If you would rather not use alcohol in your tiramisu due to diet restrictions or because you want to serve it to children, you may replace the Marsala with an equal amount of espresso or coffee.
  3. Many people, especially those who are not excessively fond of coffee, might find brewed espresso very strong. In this case, please feel free to dilute the espresso or coffee to the desired strength.
  4. It is generally suggested that cream with 25% fat is best for making mascarpone, but 36% works just as well.
  5. We both used lime juice. Deeba has a recipe for mascarpone posted on her blog here.
  6. The mascarpone recipe below is for approximately 340gms of mascarpone. The tiramisu recipe requires only 1/3 cup/75gms so you may scale down the recipe to requirement or put the extra mascarpone cheese to other equally good use. (100gms cream will yield approximately 75gms mascarpone)
  7. While using the double boiler to make the mascarpone as well as the zabaglione, always ensure that the bottom of the bowl on top doesn't touch the bottom of the lower one.
  8. Ladyfinger batter is very fragile so fold in the flour and yolks very carefully into the meringue so that the whites don't lose their volume.
  9. It might be a good idea to decide the size of the dish in which you intend to set the dessert, and make the fingers to a size which would fit that dish. This makes it easier when assembling the tiramisu later. Do remember that ladyfingers/ savioardi puff up a little while baking.
  10. Ladyfinger biscuits may be stored up to a week in an airtight container. We both made the savoiardi fingers 4-5 days in advance, and stored them in an airtight box in a cool place (or the refrigerator).
  11. We both made the zabaglione & pastry cream the previous day, and assembled the tiramisu the next morning. I (Aparna) then froze my tiramisu for 7 days before decorating and serving it.
  12. Placing the bowl (in which cream is to be whipped) and the beaters of the hand held electric mixer in the fridge for about 1/2 to 1 hour before hand makes the cream whip up very well.
  13. Do not dip the ladyfinger/ savoiardi into the coffee solution for more than ONE second, or they might become very fragile & disintegrate. Extra soaking is likely to spoil the end product, making it soggy. I (Aparna) dipped my biscuits only on one side and found they soaked up more than enough coffee solution.
  14. If you would like to de-mould your tiramisu from your dish (cutting can be easier and neater this way, you can line your dish with plastic wrap (leaving a little extra on the sides of the dish) and then start assembling your tiramisu. Once the tiramisu sets in the refrigerator, you can use the overhang to pull the tiramisu out of the dish.

VARIATIONS:
Tiramisu is usually made in square dishes and cut into squares to serve. If you want to be different, please feel free to give full rein to your creativity as to how you want to present, decorate and serve your tiramisu. Make it square, round, as individual servings, or whatever!

PREPARATION TIME:
Tiramisu is made up of several components which can be made separately and ahead of time and put together the day before serving.
Making tiramisu from scratch requires about 2 to 3 days (including refrigeration) from when you start making the mascarpone to the time the tiramisu is served. So this challenge requires some prior planning.

Please read the instructions as you need to begin making the mascarpone at least a day in advance.
The zabaglione & pastry cream also need 4 hours to an overnight for chilling, as does the main dessert. The flavours mature after an overnight rest, and the dessert can be kept refrigerated for 2-3 days.
Once assembled, the tiramisu can be frozen till you need to serve it, in case you are not serving it immediately.

EQUIPMENT REQUIRED:
  • A double boiler (a stainless steel bowl that fits inside a large saucepan/ pot without touching the bottom will do)
  • Two or three large mixing bowls
  • Whisk
  • A medium sized heavy bottomed pan
  • Fine meshed strainer (to remove lumps from pastry cream, if any)
  • Electric mixer, hand held
  • Serving dish (or dishes) of choice (8" by 8" should be fine)
  • Spatula for folding and spoons as required
  • Plastic wrap/ clingfilm
  • Baking sheets
  • Parchment paper or nonstick liners
  • Pastry bag (can be disposable)
  • Plain 3/4" pastry bag tip or cut the end of pastry bag to this size (If you don’t have a pastry bag and/or tips, you can use a Ziploc bag with the corner snipped off)
  • Oven
  • Cooling rack
  • Thin-bladed spatula for removing ladyfinger biscuits from the baking sheets
  • Instant-read thermometer (optional)
  • Strainer
  • Cheesecloth or cotton napkin for draining mascarpone
  • Fine-mesh strainer for shaking cocoa powder on tiramisu
TIRAMISU
(Recipe source: Carminantonio's Tiramisu from The Washington Post, July 11 2007 )
This recipe makes 6 servings
Ingredients:
For the zabaglione:
2 large egg yolks
3 tablespoons sugar/50gms
1/4 cup/60ml Marsala wine (or port or coffee)
1/4 teaspoon/ 1.25ml vanilla extract
1/2 teaspoon finely grated lemon zest
For the vanilla pastry cream:
1/4 cup/55gms sugar
1 tablespoon/8gms all purpose flour
1/2 teaspoon finely grated lemon zest
1/2 teaspoon/ 2.5ml vanilla extract
1 large egg yolk
3/4 cup/175ml whole milk
For the whipped cream:
1 cup/235ml chilled heavy cream (we used 25%)
1/4 cup/55gms sugar
1/2 teaspoon/ 2.5ml vanilla extract
To assemble the tiramisu:
2 cups/470ml brewed espresso, warmed
1 teaspoon/5ml rum extract (optional)
1/2 cup/110gms sugar
1/3 cup/75gms mascarpone cheese
36 savoiardi/ ladyfinger biscuits (you may use less)
2 tablespoons/30gms unsweetened cocoa powder
Method:
For the zabaglione:
Heat water in a double boiler. If you don’t have a double boiler, place a pot with about an inch of water in it on the stove. Place a heat-proof bowl in the pot making sure the bottom does not touch the water.
In a large mixing bowl (or stainless steel mixing bowl), mix together the egg yolks, sugar, the Marsala (or espresso/ coffee), vanilla extract and lemon zest. Whisk together until the yolks are fully blended and the mixture looks smooth.
Transfer the mixture to the top of a double boiler or place your bowl over the pan/ pot with simmering water. Cook the egg mixture over low heat, stirring constantly, for about 8 minutes or until it resembles thick custard. It may bubble a bit as it reaches that consistency.
Let cool to room temperature and transfer the zabaglione to a bowl. Cover and refrigerate at least 4 hours or overnight, until thoroughly chilled.
For the pastry cream:
Mix together the sugar, flour, lemon zest and vanilla extract in a medium heavy-bottomed saucepan. To this add the egg yolk and half the milk. Whisk until smooth.
Now place the saucepan over low heat and cook, stirring constantly to prevent the mixture from curdling.
Add the remaining milk a little at a time, still stirring constantly. After about 12 minutes the mixture will be thick, free of lumps and beginning to bubble. (If you have a few lumps, don’t worry. You can push the cream through a fine-mesh strainer.)
Transfer the pastry cream to a bowl and cool to room temperature. Cover with plastic film and refrigerate at least 4 hours or overnight, until thoroughly chilled.
For the whipped cream:
Combine the cream, sugar and vanilla extract in a mixing bowl. Beat with an electric hand mixer or immersion blender until the mixture holds stiff peaks. Set aside.
To assemble the tiramisu:
Have ready a rectangular serving dish (about 8" by 8" should do) or one of your choice.
Mix together the warm espresso, rum extract and sugar in a shallow dish, whisking to mix well. Set aside to cool.
In a large bowl, beat the mascarpone cheese with a spoon to break down the lumps and make it smooth. This will make it easier to fold. Add the prepared and chilled zabaglione and pastry cream, blending until just combined. Gently fold in the whipped cream. Set this cream mixture aside.
Now to start assembling the tiramisu.
Workings quickly, dip 12 of the ladyfingers in the sweetened espresso, about 1 second per side. They should be moist but not soggy. Immediately transfer each ladyfinger to the platter, placing them side by side in a single row. You may break a lady finger into two, if necessary, to ensure the base of your dish is completely covered.
Spoon one-third of the cream mixture on top of the ladyfingers, then use a rubber spatula or spreading knife to cover the top evenly, all the way to the edges.
Repeat to create 2 more layers, using 12 ladyfingers and the cream mixture for each layer. Clean any spilled cream mixture; cover carefully with plastic wrap and refrigerate the tiramisu overnight.
To serve, carefully remove the plastic wrap and sprinkle the tiramisu with cocoa powder using a fine-mesh strainer or decorate as you please. Cut into individual portions and serve.
MASCARPONE CHEESE
(Source: Vera’s Recipe for Homemade Mascarpone Cheese)
This recipe makes 12oz/ 340gm of mascarpone cheese
Ingredients:
474ml (approx. 500ml)/ 2 cups whipping (36 %) pasteurized (not ultra-pasteurized), preferably organic cream (between 25% to 36% cream will do)
1 tablespoon fresh lemon juice
Method:

Bring 1 inch of water to a boil in a wide skillet. Reduce the heat to medium-low so the water is barely simmering. Pour the cream into a medium heat-resistant bowl, then place the bowl into the skillet. Heat the cream, stirring often, to 190 F. If you do not have a thermometer, wait until small bubbles keep trying to push up to the surface.
It will take about 15 minutes of delicate heating. Add the lemon juice and continue heating the mixture, stirring gently, until the cream curdles. Do not expect the same action as you see during ricotta cheese making. All that the whipping cream will do is become thicker, like a well-done crème anglaise. It will cover a back of your wooden spoon thickly. You will see just a few clear whey streaks when you stir. Remove the bowl from the water and let cool for about 20 minutes. Meanwhile, line a sieve with four layers of dampened cheesecloth and set it over a bowl. Transfer the mixture into the lined sieve. Do not squeeze the cheese in the cheesecloth or press on its surface (be patient, it will firm up after refrigeration time). Once cooled completely, cover with plastic wrap and refrigerate (in the sieve) overnight or up to 24 hours.
Vera’s notes: The first time I made mascarpone I had all doubts if it’d been cooked enough, because of its custard-like texture. Have no fear, it will firm up beautifully in the fridge, and will yet remain lusciously creamy.
Keep refrigerated and use within 3 to 4 days.
LADYFINGERS/ SAVOIARDI BISCUITS
(Source: Recipe from Cordon Bleu At Home)
This recipe makes approximately 24 big ladyfingers or 45 small (2 1/2" to 3" long) ladyfingers.
Ingredients:
3 eggs, separated
6 tablespoons /75gms granulated sugar
3/4 cup/95gms cake flour, sifted (or 3/4 cup all purpose flour + 2 tbsp corn starch)
6 tablespoons /50gms confectioner's sugar,
Method:

Preheat your oven to 350 F (175 C) degrees, then lightly brush 2 baking sheets with oil or softened butter and line with parchment paper.
Beat the egg whites using a hand held electric mixer until stiff peaks form. Gradually add granulate sugar and continue beating until the egg whites become stiff again, glossy and smooth.
In a small bowl, beat the egg yolks lightly with a fork and fold them into the meringue, using a wooden spoon. Sift the flour over this mixture and fold gently until just mixed. It is important to fold very gently and not overdo the folding. Otherwise the batter would deflate and lose volume resulting in ladyfingers which are flat and not spongy.
Fit a pastry bag with a plain tip (or just snip the end off; you could also use a Ziploc bag) and fill with the batter. Pipe the batter into 5" long and 3/4" wide strips leaving about 1" space in between the strips.
Sprinkle half the confectioner's sugar over the ladyfingers and wait for 5 minutes. The sugar will pearl or look wet and glisten. Now sprinkle the remaining sugar. This helps to give the ladyfingers their characteristic crispness.
Hold the parchment paper in place with your thumb and lift one side of the baking sheet and gently tap it on the work surface to remove excess sprinkled sugar.
Bake the ladyfingers for 10 minutes, then rotate the sheets and bake for another 5 minutes or so until the puff up, turn lightly golden brown and are still soft.
Allow them to cool slightly on the sheets for about 5 minutes and then remove the ladyfingers from the baking sheet with a metal spatula while still hot, and cool on a rack.

23.2.10

Win this Basket of Canadian Foodie Goodies

I was the lucky winner of a food basket from Velva at Tomatoes on the Vine in Florida.  The only stipulation was that I also offer one from my country of origin.  It has been fun to find a few things that are not your stereotypical Canadiana.  There is more to Canadian cuisine than maple sugar!

So if you are interested in winning this lovely basket, please leave a comment on this post telling me how much you would enjoy receiving it!  Also, you must commit to offering such a basket from your locale within the next 6 months.  I just thought of one more (optional) requirement - share your creative uses of these ingredients with us!  I would love to see how you use them.

I will be using www.random.org to select the winner.  Each reply will be given a number and the lucky number will receive this gift.  The contest will close on Saturday.  Anyone who is reading, please feel free to pass this on to your other favourite bloggers so they can also enter the draw.


This is the booty:

La Carminee du Terroir  Quintessence de pommes
    This is a reduction made entirely of fresh apples.  It has been reduced to a balsamic type reduction and is heavenly.  I have added it to fresh strawberries and also with braised beef short ribs.  It adds a certain complexity to your food.  I think it would be great with an aged cheddar.


Huile de Homard du Canada.  This is a lobster infused oil from the Marche Transatlantique.  This unique and aromatic oil would be lovely drizzled on a seafood pasta, a lobster bisque or any other savoury seafood dish you might be making.

Wild rice from Manitoba.  This is actually a grass rather than a rice but it is so wonderful.  This is one of my favourites.  I usually make a pilaf mixed with a long grain white rice and a mirepoix.  It also makes a wonderful salad.  I think I might make a gratin in the near future and post that on my blog.

Smoked arctic char from Nunuvut.  Also from Nunuvut is an ulu.  Both of these items are courtesy of my sister who is living in Chesterfield Inlet at the moment.  I am so lucky to have such a great sister!  She has offered these two items to add to my basket.  An ulu is a traditional Inuit knive similar to a mezzaluna.  It has a half moon shape and a single handle to have the best leverage possible.  It would be traditionally have many uses in the culture but I think it would be great as a pizza cutter or to chop veggies in our kitchens.  The Arctic char is a fish akin to salmon and this smoked version would be wonderful with cream cheese, diced red onions, lemon wedges and crackers.  You could make it into a wonderful dip or toss with pasta.

Last but not least is a traditional prairie Canadian treat - Saskatoon berry syrup.  Saskatoon berries are only found in Alberta, Saskatchewan and Manitoba.  We usually have them in pies but also use them in syrups and jams.

22.2.10

Spicy Corn Crackers


I brought back this bag of blue corn meal from Tennessee.  I am sure I can find it here, but I got so excited about all the great ingredients that I am sure I cannot find in Calgary that I may have over bought a tad.  This recipe is on the back of the package so I thought I would give it a try.  It is really good and very simple.  They taste best if the bottom of the cracker does not become too browned.  I didn’t have any of the spices!  I couldn’t believe it.  I used a tablespoon of Tony Cachere’s Cajun Seasoning that I also bought in the South.
Spicy Corn Crackers      adapted from Arrowhead Mills

½ c buttermilk
3 T vegetable oil
1 c blue corn meal
½ c pastry flour
¾ t salt
¼ t baking soda
1/8 t cayenne
½ t chili powder, or more, to taste
1 t garlic powder

Preheat oven to 350F.  Combine buttermilk and oil.  In separate mixing bowl, thoroughly stir together the dry ingredients.  Add milk mixture and stir until dough forms a ball. Knead on floured board (adding a little more flour if necessary) about 5 minutes.  Divide dough in half and roll each.  Roll as thinly as possible.  Cut into 2-inch squares.  Sprinkle with additional salt or paprika.  Bake on baking sheet lined with parchment paper for about 15 minutes.  Be careful not to brown the bottoms.  Cool slightly before removing from baking sheet, finish cooling on wire rack.  Store in loosely covered container.  Makes about 4 dozen.

19.2.10

Classic Apfelstrudel


  • 3 cups bread flour
  • 1 egg
  • 1/4 cup soft, unsalted butter
  • 1/2 teaspoon salt
  • 1 cup cold water
  • vegetable oil
  •  flour
  • 3/4 cups coarse white bread crumbs
  • 1/2 cup, melted unsalted butter
  • 1 1/2 pounds, 14 ounces peeled, cored and thinly sliced Granny Smith, Pippin or other cooking apples
  • 1/3 cup granulated sugar
  • 3/4 cup dark raisins
  • 3/4 cup coarsely crushed nuts
  • 2 teaspoon ground cinnamon
  • 5 ounces firm, unsalted butter
To make the dough: Place the flour, egg, soft butter and salt in the bowl of an electric mixer. Mixing with the dough hook on low speed, add enough of the cold water to make a soft dough. Knead the dough in the electric mixer at medium speed until it is smooth and elastic, about 5 minutes. Form the dough into a ball and coat it with oil. Cover and let rest at room temperature for about 1 hour.
For the filling: To make the coarse bread crumbs, toast slices of white bread in the oven until crisp, about 10 minutes. Break into pieces and place in a food processor. Pulse the processor until the bread resembles large bread crumbs. In a saute pan, over medium heat, saute the bread crumbs in 1/4 cup of the melted butter until they are golden brown. Reserve the sauteed bread crumbs and the remaining melted butter separately. Combine the sliced apples, granulated sugar, raisins, nuts, ground cinnamon and about half of the bread crumbs. Cut the firm butter into chunks and gently toss together with the apple mixture.
To Assemble: Cover a work surface approximately 4 feet by 4 feet with a clean piece of cloth. The cloth is used to facilitate stretching and rolling the dough. Make sure that the cloth is securely fastened to the table. Dust the cloth lightly with the flour. Place the rested dough in the center of the cloth. Using a rolling pin, roll the dough into a large, thin rectangle. When the dough is as thin as it will go with the rolling pin, it is time to begin stretching and pulling the dough. To stretch and pull the dough, place your hands under the dough, and, using your thumbs and the back of your hand, gently begin pulling and stretching the dough. Pull and stretch the dough until it is a rectangle approximately 3 1/2 feet by 2 1/2 feet. Be very careful when you are pulling and stretching not to tear the dough. After it is pulled to the proper size, let the dough relax on the table for a few minutes. There will be a thick edge around the edges, trim this away. You also want to trim off any parts of the dough that hang over the edges of the table. Place the apple filling next to the long edge of the dough closest to you. Form the filling into a thick log. Brush some of the reserved melted butter generously over the remainder of the dough. Sprinkle the remaining bread crumbs over the dough. Using the cloth to help lift the dough, roll the strudel as you would a jelly roll, starting from the filling side. Place the strudel, seam side down, in a horseshoe shape on a sheet pan lined with parchment paper. Brush the strudel with the last of the melted butter. Bake in a preheated 375 degree F oven for about 35 minutes, Remove the pan from the oven and cool. Slice the the strudel into individual servings and serve either warm or at room temperature. 

You are supposed to be able to read a newspaper through the rolled out dough.

16.2.10

My Foodie Gift Arrived

The Foodie Gift that I won from Velva at Tomatoes on the Vine arrived today!  It was so exciting, just like Christmas!

It was definitely a chocolate lover's gift package.  There was a package of an Assortment of Intense Dark Chocolates from Ghiradelli, Starbuck's Caffe Verone with cocoa tasting notes, Cocoa Roast Almonds (I have never seen these before, yummy), Hershey's dark chocolate covered peppermint patties and Hershey's Kisses.

Also, I received a nice tin of star anise, agave nectar, pecans from south Georgia, and Everglades Fish & Chicken seasoning.

I have been craving some snacks so now I will enjoy many, many hours of wonderful food.  I have always wanted to try agave syrup.  I ate so many pecans when I was in Tennessee but didn't bring any back to Canada.  They cost an arm and a leg up here.

A big THANK YOU, Velva.  I never win anything so this will be such a treat.

A requirement of entering Velva's draw was that I would offer a similar package with products from my area.  Look for that coming up soon.

15.2.10

Braised Beef Short Ribs with Creamy Mashed Potatoes

I bought Cooking Light this month and there were a number of interesting recipes.  They didn't at all look like diet food.  Today I made the Braised Beef Short Ribs.  I adapted their recipe and added a few interesting ingredients I had on hand.

Short ribs are a less tender cut of beef and also less expensive.  They benefit from a slow, moist cooking method.  All of the connective tissue becomes tender and the collagen breaks down offering the dish a nice richness.  There was a lot of fat in my short ribs so I cut a lot out before cooking and then after cooking, I chilled the resultant sauce and skimmed off any fat that hardened on top.  The result is relatively low fat.

To keep with the low fat theme for dinner, I made whipped Yukon Gold potatoes with plain yogurt rather than sour cream or butter.

To top off the meal, I made No Knead Bread and used this Robin Hood bread blend.  It was delicious.  I used the bread blend (with multi-grains) cup for cup for the white flour in the recipe.  I cooked it in a Pyrex casserole with a lid this time.

Braised Beef Short Ribs

about 2 lbs of beef short ribs
1/2 c flour
salt, black pepper
2 T olive oil
1 celery rib, diced
2 large carrots, diced
1/2 large yellow onion, diced
1 leek, white part only, diced
1 garlic clove
10 whole black peppercorns
5 juniper berries
2 bay leaves
3 fresh thyme sprigs or 1/2 t dried thyme
2 T veal demi-glace
1 c water
1/2 c robust red wine
1 T Apple Quintessence 

 Season beef short ribs with salt and pepper and dredge in flour.  Sear them a few at a time in a large ovenproof casserole.  Sear on all sides and set aside.

To the same pot, add the celery, onion, carrot, leeks and garlic.  Saute for 5 minutes or until softened.  Add the remainder of the ingredients.  Add the beef.

Bake in the oven at 350F for about 2 hours or until fall apart tender.

Remove the beef from the pot and remove any excess fat.  If all of the liquid has evaporated from the pot then add one or two cups of water and bring to a boil.  Strain to remove all the vegetables and other solids.  Chill the broth so you can remove any fat that hardens on the top.

After de-fatting, you may thicken the sauce if you wish.  Add one tablespoon of flour or cornstarch, whisk to incorporate and bring to a boil.  Pour this sauce over the short ribs.

Serve with creamy mashed potatoes or mushroom risotto.

14.2.10

The February Daring Cooks Challenge - Mezze

I love Mediterranean cooking and I love making mezzes or small plates.  Mezzes would traditionally be served in Lebanon, Greece and Cyprus, Turkey, Serbia, and Albania.

The two requirements for this challenge are to make pita bread and hummus from scratch.  The other items for our mezze is at our own choice.  Sit back and enjoy!

My mezze selections include grilled halloumi cheese with a sprinkle of dried thyme and a squeeze of lemon juice, pickled beets, marinated olives, hummus, roasted marcona almonds, spinach fatayer and meat fatayer, tzatziki and pita bread.  I made my pita bread with 50/50 whole wheat/white flour.

The oven in this house I am sitting is just terrible.  I is supposed to go up to 500F but it keeps shutting down on me.  So the temperature was different for each batch of pitas.  And this is my first try at pita and I don't think it is as simple as it looks.  It is nice to get all puffy but it should deflate and be soft.  Mine was still hard.  Best used for pita chips.


The 2010 February Daring Bakers challenge was hosted by Michele of Veggie Num Nums. Michele chose to challenge everyone to make mezze based on various recipes from Claudia Roden, Jeffrey Alford and Naomi Dugid.


Pita Bread – Recipe adapted from Flatbreads & Flavors by Jeffrey Alford and Naomi Duguid
Prep time: 20 minutes to make, 90 minutes to rise and about 45 minutes to cook

2 t regular dry yeast
2 1/2 c lukewarm water
5-6 c all-purpose flour (may use a combination of 50% whole wheat and 50% all-purpose, or a combination of alternative flours for gluten free pita)
1 T table salt
2 T olive oil

Directions:
1. In a large bread bowl, sprinkle the yeast over the warm water. Stir to dissolve. Stir in 3 cups flour, a cup at a time, and then stir 100 times, about 1 minute, in the same direction to activate the gluten. Let this sponge rest for at least 10 minutes, or as long as 2 hours.

2. Sprinkle the salt over the sponge and stir in the olive oil. Mix well. Add more flour, a cup at a time, until the dough is too stiff to stir. Turn it out onto a lightly floured surface and knead for 8 to 10 minutes, until smooth and elastic. Rinse out the bowl, dry, and lightly oil. Return the dough to the bowl and cover with plastic wrap. Let rise until at least doubled in size, approximately 1 1/2 hours.

3. Place a pizza stone, or two small baking sheets, on the bottom rack of your oven, leaving a 1-inch gap all around between the stone or sheets and the oven walls to allow heat to circulate. Preheat the oven to 450F (230C).

4. Gently punch down the dough. Divide the dough in half, and then set half aside, covered, while you work with the rest. Divide the other half into 8 equal pieces and flatten each piece with lightly floured hands. Roll out each piece to a circle 8 to 9 inches in diameter and less than 1/4 inch thick. Keep the rolled-out breads covered until ready to bake, but do not stack.
5. Place 2 breads, or more if your oven is large enough, on the stone or baking sheets, and bake for 2 - 3 minutes, or until each bread has gone into a full balloon. If for some reason your bread doesn't puff up, don't worry it should still taste delicious. Wrap the baked breads together in a large kitchen towel to keep them warm and soft while you bake the remaining rolled-out breads. Then repeat with the rest of the dough.

Hummus – Recipe adapted from The New Book of Middle Eastern Food by Claudia Roden

Prep Time: Hummus can be made in about 15 minutes once the beans are cooked. If you’re using dried beans you need to soak them overnight and then cook them the next day which takes about 90 minutes.  This hummus can be additionally flavoured with 1/3 c roasted red or orange sweet peppers and smoked paprika, carmelized onions or any other combination you would like to dream up.

1 1/2 c dried chickpeas, soaked in cold water overnight (or substitute well drained canned chickpeas and omit the cooking) (10 ounces/310 ml)
2 lemons, juiced
2-3 garlic cloves, peeled and crushed
a big pinch of salt
4 T tahini (sesame paste) OR use peanut butter or any other nut butter—feel free to experiment)

Directions:
1. Drain and boil the soaked chickpeas in fresh water for about 1 ½ hours, or until tender. Drain, but reserve the cooking liquid.
2. Puree the beans in a food processor (or you can use a potato masher) adding the cooking water as needed until you have a smooth paste.
3. Add the rest of the ingredients and mix well. Adjust the seasonings to taste.

Fatayer
A frozen puff pastry or phyllo dough can be substituted for the traditional dough.
  1. Cut pieces of phyllo pastry into squares about 6 inches square.  Brush one piece with melted butter and then lay another piece over it.  Brush with melted butter.  Continue until you have about 6 pieces.
  2. Place a spoonful of the filling mixture in the center of the pastry.
  3. Roll up all the edges to form a triangle with the centre open.  Brush with butter.
  4. Repeat until you have used all the ingredients.
  5. Arrange the meat pies on a greased baking sheet and bake in a 350°F oven for 15 – 20 minutes, or until lightly browned.
  6. Serve hot or cold.

Kefta

(Middle Eastern spiced meatballs)
Spiced meatballs are common in one form or another from Morocco in the west through the Middle East (kefta or kufta), to Greece (keftedes), Turkey (köfte), Armenia (kyufta), Iran (kufteh, or koofteh) and all the way to India (kofta) in the east. All names for these little balls of wonder derive from the Persian verb kuftan, which means "to grind."

4 to 6 servings, or about 20 meatballs
  • Ground lamb or beef, or a mixture of the two -- 2 pounds
  • Onion, minced -- 1
  • Fresh parsley or mint, finely chopped -- 1/2 bunch
  • Ground cumin -- 1 tablespoon
  • Cinnamon -- 2 teaspoons
  • Allspice (optional) -- 1 teaspoon
  • Salt and pepper -- to season
  • Oil -- 1/4 cup
  1. Place the ground beef or lamb, onion, herbs, spices, salt and pepper in a large bowl and knead together well. Wrap in plastic and chill for 1-2 hours to allow the flavors to mingle and make the meat easier to handle.
  2. Form the meat mixture into balls, patties or ovals the size of a small egg.
  3. Heat the oil in a skillet over medium flame and, working in batches, sauté the meatballs until browned on all sides and cooked through. Browned meatballs can also be finished in a 350ºF oven.
  4. Serve as is or in pita bread as a sandwich with tzatziki sauce.
In Greek: τζατζίκι, pronounced dza-DZEE-kee
Tzatziki is traditionally served as an appetizer and can be left on the table as an accompaniment to foods throughout the meal. The key to great tzatziki is the thick creamy texture that allows it to be eaten alone, as a dip, as a spread, and as a condiment.

  • 16 ounces (2 cups) of thick Greek yogurt
  • 4 to 10 cloves of garlic, finely chopped
  • 1/2 cup of diced or grated cucumber (Kirby or "English")
  • 1 tablespoon of olive oil
  • 2 teaspoons of lemon juice
Prepare all ingredients in advance. Combine oil and lemon juice in a medium mixing bowl. Fold the yogurt in slowly, making sure it mixes completely with the oil. Add the garlic, according to taste, and the cucumber. Stir until evenly distributed. Garnish with a bit of green and serve well chilled.
Yield: about 2 1/2 cups
Add mint or dill: Slight variations include 1-2 tablespoons of finely chopped fresh dill and/or fresh mint. Tasty additions!

Grilled Halloumi Cheese

Halloumi is a cheese from Cyprus.  It is very firm and is meant to be grilled so don't worry about it melting all over the place.  You can even grill it on your barbecue.  Marinade the cheese in olive oil and thyme for a few minutes.  Then grill in a hot pan or on the barbecue.  Grill both sides.  When done, remove to a serving plate and squeeze lemon juice over.  Alternatively, you could flame it with a liquor like ouzo.

13.2.10

Meringues for Valentine's Day


I just love making meringues and pavlovas.  This is a simple dessert that is calorie friendly.  I used some of the Apple Quintessence that I purchased at Flavours of the World with the strawberries.  Just a quick note - remember this rule for best volume 'eggs should be at room temperature and cream should be as cold as possible'.

Meringues

4 large egg whites
1/4 t cream of tartar
1 c superfine sugar
1/2 t vanilla

Beat the egg whites until soft peaks form.  Add the cream of tartar and gradually add the sugar as you continue to beat to hard peak stage.  Add vanilla just before finishing.

Mound on parchment lined baking sheets and make an indentation in the middle with a spoon.  Bake at 200F for 1 1/2 - 2 hours.  Bake until firm and dry but not browned.  Turn off the oven and let them sit over night.

Fill with any fruit of your choice.

This is a picture of my Valentine!  Doesn't she look good with her new hair cut and winter coat?

12.2.10

It must be the Olympics & Rainbow Trout baked in the oven....

Garbage pick-up day in this lazy little hamlet was Saturday and then they changed it to Thursday just last week.  Well, I didn’t realize this until I was sitting at a desk in the post office using internet.  “It is today”, said the postmistress.

I was late and didn’t bother.  But today I caught glimpse of a half ton truck picking up garbage and thought I may as well put mine out.  Where else would they pick up your garbage a day late but in a little prairie village.  Life is good.

It must be the Olympics that make me so sappy about my country right now.  As I sit here tonight watching the opening ceremonies tears trace down my cheeks.  Even with the costume malfunction, they did an amazing job in Vancouver.  Welcome, everyone!

Valentines Day, step aside.  Love will still be here tomorrow.  Here is a tribute to Canada through a nice dinner tonight.

I shopped at Flavours of the World when I was in Calgary.  Chef Desnoyers has opened this nice little gourmet shop.

He gave me a little gift of an Asian inspired spice rub with wild crafted fennel pollen under the label Chef Bernard .  I had a nice little rainbow trout in the fridge.  I sliced a yellow onion to make a bed for the fish in a baking dish.  I rubbed the fish, inside and out, with the spice blend.  Then I stuffed the fish with sliced onions and lemons and placed sliced lemons on top, too.

I baked it at 475F for 15 minutes.

I served it with a wild rice pilaf and oven roasted acorn squash.  I brushed a little of my cedar jelly on the squash toward the end of the baking time.  It was a great meal!


Even though rainbow trout is a small fish, it is enough for two servings.  I will use my leftover fish in a pasta salad or in a sandwich with a bit of mayonnaise.

An Award for 'Story' Telling!


Mags at Other Side of Fifty passed on to me Lesa's Bald Faced Liar "Creative Writer" Blogger Award.  After visiting Jonesborough, Tennessee which is the 'Story Telling Capital of the World' I have a little exposure to weaving a thread.  But this has been one of the most difficult pieces of writing that I have ever done!  Thanks, Mags!

First I wanted to show you more pictures of the hamlet of Neville, Saskatchewan.  Match the pictures above with these descriptions - church, grain elevator, hockey rink and curling rink, general store.

I'm touched, naturally, to receive this award and will try to follow the rules that accompany it.  They are:

1. Thank the person who gave this to you.
2. Copy the logo and place it on your blog.
3. Link to the person who nominated you.
4. Tell us up to six outrageous lies about yourself, and at least one outrageous truth.
5. Allow your readers to guess which one or more are true.
5. Nominate seven "Creative Writers" who might have fun coming up with outrageous lies.
6. Post links to the seven blogs you nominate.
7. Leave a comment on each of the blogs letting them know you nominated them.

So without further ado, I present to you my outrageous lies and at least one outrageous truth. If you comment on this post try to guess which one/ones are true.  "Truth is beautiful, without doubt; but so are lies."
- Ralph Waldo Emerson
.


#1 Colonel Sanders paid my way through University.  Well, I cooked his chicken and got paid for it.  That put me through University.

#2 My Miss Sugar mews once for a drink of water, twice for treats and three times to go play in the basement.

#3 When I was in Tennessee I partook of the local specialties.  I experienced squirrel stew for the first time.

#4 Back in the 60’s I was so skinny that my father cooked pancakes every morning before I went to school and I would eat two dozen with Aunt Jemima syrup.

#5  When I was a kid on the farm we would walk 3 miles to school every day, through rain, sleet or snow….all uphill…both ways…barefoot.

#6 My father was a hunter and we grew up on wild game – venison, elk and moose.  But my favourite was jackelope.  That is a cross between a jack rabbit and an antelope.

#7 I could sit here all day and make up lies!

I'd like to pass on this award to the following bloggers. I've enjoyed reading their blogs on a daily basis and consider them all very talented in the kitchen as well as in the blogging world. Please don't feel any obligation to participate in this little game of outrageous lies, but if you'd like to join in on the fun, I'd love to hear your lies!

Andrea from The Kitchen Witch  
Mags from The Other Side of Fifty  
Pam at Sidewalk Shoes   
Simone at Junglefrog Cooking   
Dharm at Dad-Baker and Chef   
Marjie at Modern Day Ozzie and Harriet   
Valli at More Than Burnt Toast  

10.2.10

There is More to Canadian Cooking than Maple Sugar


I am the lucky recipient of a food basket of Floridian food that will be arriving any day.    Part of the requirements in receiving this gift is to provide a draw of my home country’s foods.  This is the impetus for my curiosity.

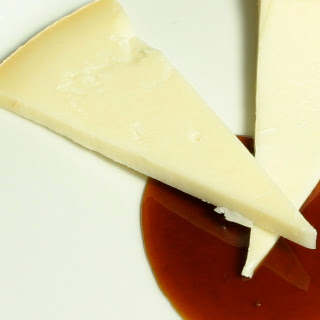
This is a nice Quebec cheese with the Apple Quintessence for dipping.

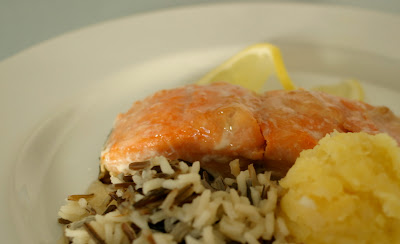
Tonight I made a simple dinner of Arctic char, wild rice and mashed turnips with butter.  You can’t get any more Canadian than that!  I also bought a few interesting ingredients – Cedar jelly and an apple reduction similar to a very good balsamic glaze.  All are Canadian.  So, you can look forward to some of these wonderful Canadian ingredients as I plan my contest.  I am waiting for one special item and when that arrives, I can post the prize package.

Here are some more pictures of my little hamlet in Saskatchewan.  A hamlet is smaller than a village!  These are some street signs.

7.2.10

Home again...finally!


After 5 days and 3000 miles I am back in Canada.  What a nice feeling to be home!  If it had not been -21C (-5F) I would have bent down and kissed the ground!

Thank you everyone for keeping tabs on me!  I love my blogging friends!  I am so frustrated without reliable internet.   Today I am in Calgary catching up on a few months of mail and errands.  Plus, I have a sister in town having surgery so I am glad to be here to help her out.  On Monday I am back to the little house on the prairie.

New experiences are wonderful but coming home is always exciting.  I don’t know if I have mentioned, but I am homeless at the moment.  I have sold my house in Calgary and now I have the task of finding a new house to call home.

In the meantime, I am living in a friend’s house in Neville, Saskatchewan.  I know, I had never heard of it either until they moved here.  It is in the middle of NOWHERE!  The village has about 10 houses, a post office and one grain elevator.  I am 37 km from a small city.   It is mixed ranching and grain farming in this area.

This is a picture of what I arrived to – freshly fallen snow.  This is the little house I will be living in for the time being.


Hey, I found an advantage to this cold.  Check out this Canadian champagne chiller!  It works really well and it was free!

I have no cell phone service or internet and I have finally figured out the satellite television.  This is quiet!  But I do have television!  Yeah for the Canadian Food Network – Chef Michael Smith is one of my favourite.  And Restaurant Makeover is another favourite program.

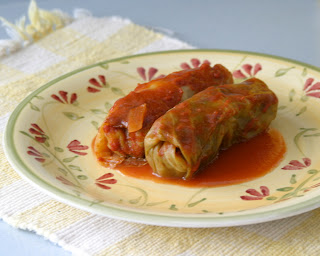
I had an overwhelming urge to make cabbage rolls.  This is the recipe from The Joy of Cooking.

Cabbage Rolls           adapted from The Joy of Cooking

Combine in a large bowl:
1 lb. lean ground beef
½ c white rice
1 large egg
½ c breadcrumbs
½ c water
1 carrot, shredded
1 onion, finely chopped
salt and pepper to taste

Bring to a rolling boil in a pot large enough to hold the head of cabbage:
Water to cover the package
1 ½ t salt

With a small sharp knife cut the core out of the cabbage.  Cook in the boiling water for 4 or 5 minutes or until the outer leaves are soft enough to pull off.  Remove the cabbage from the water and remove as many leaves as possible.  Return the cabbage to the boiling water for a few more minutes.  Remove the rest of the leaves.

The cabbage can also be frozen for 24 hours rather than boiling to soften the leaves.

Trim off the back spine of each leaf so it will be supple and can be easily rolled.  With the core end of the leaf near you and the hollow side up, put enough filling to leave a 1 ½ inch space at each end.  Roll firmly and fold in the right end as you roll up.  Tuck the left end into itself, closing the opening.  Repeat until all the filling and leaves are used.

Coarsely chop the leaves that were too small to use and a half onion.  Sauté in olive oil until soft.  Add:
1 28 oz can of plum tomatoes, puréed, cut up or broken
1 c water
2 T brown sugar

Put this sauce in the bottom of the baking dish and place the cabbage rolls on top.  Be sure to fit the rolls in tightly.  If they are not covered in the tomato sauce, add water or stock to cover.  Simmer for 1 ½ hours or bake in a 350F oven for 1 ½ hours.

Kaalikääryleet (Cabbage Rolls)

6.2.10

Saturday Blog Showcase - Homemade Yogurt


My sister makes yogurt all the time.  And I used to!  I graduated with a degree in Home Economics in 1970 so I was into all of that 'hippy' stuff.  But it has been years and I was a little shaky on just doing it from memory.

I found this wonderful blog through Tastespotting.  Sunday Hotpants makes it just like I remember doing it.  I thank her for her posting.  My comments are in italics.

This is my Saturday Blog Showcase contribution this week.  All That Splatters is hosting.


Fresh Home made Yoghurt    from     Sunday Hotpants
The first time you make this you will need to buy a carton of plain active yoghurt (label will tell you if it is made from live bacteria or gelatin.  Don't buy the gelatin type) from the store as your starter. After the first time you just need to retain a few tablespoons of your home made yoghurt to use as your starter.

If you are retaining some for a starter for next time you need to get your new batch started within 5-7 days, so it still has some oompf there.

Make sure you have a clean container with a lid to make your yoghurt in. A thermometer is helpful but not essential.  (I don't use a thermometer.  Scalded milk is the point you want to reach.  And after that I test it like I would a baby bottle - on my wrist.)
You need to use your yoghurt within 2 weeks.
You can make this with any type of milk, I chose to make this batch from a combination of whole milk and low fat milk.  (I used 2% milk.)
  • 1/ 1/2 litres milk (roughly 1 1/2 quarts)
  • 2-3 large Tblspns plain active cultured yoghurt at room temperature.
First scald your milk - put it in a large saucepan and bring it up to the temperature where it starts to foam 185F/85C. Stir while it’s coming up to temperature, you don’t want to burn your milk. Take it off the heat once it starts to foam. You can use a double boiler if you’re the nervous type.

Cool your milk down to 110F/43 C or till it just feels slightly warm to the touch. But do make sure that you stir your milk occasionally while it’s cooling so that it is the same temperature throughout.

Once your milk has cooled to that slightly warm temp (110F/43C) add your yoghurt starter to the milk and stir through to mix.  Pour  the mixture into the container that you are going to make your yoghurt in, and seal the top. (I use those high end disposable plastic containers with good lids.)

 Now you need to put it in a warm place for between 7-12 hours. You want to maintain the current temperature of the milk mixture.  (I have been heating the oven to 200F, turning it off and placing the yogurt in the warm oven overnight.  You could just wrap a blanket or towel around your containers to insulate them to keep them warm.)