Cooking Classes

Showing posts with label Chinese. Show all posts

25.10.15

Barbecue Duck Fried Rice


Back a few years ago it was all the rage to take a supermarket roasted chicken and find a multitude of ways to turn it into a tasty meal. I don't know who came up with that idea but how can you make a tasteless, over-salted bird into something you actually want to serve to guests.

I say, move over supermarket roast chicken, and instead head right down to Chinatown. I haven't had a barbecue duck that wasn't absolutely delicious. With its crispy skin and five spice flavours it is one of my favourite meats to pick up when I am in the city.

Of course, you can make a meal of it but for a change and to make it stretch a little farther try this easy fried rice. It's simple with only a few ingredients and can be a meal in itself.

If the skin loses its crispness just put the meat, skin side down, in a cast iron skillet or wok and re-crisp. Leave the fat in the pan and use it in the stir fry. Be sure to make the rice ahead of time so it can cool. Warm rice does not brown in the pan.

Barbecue Duck Fried Rice

1 Chinese style barbecue duck
3 teaspoons sesame oil
2 eggs, beaten
6 green onions, shredded
1 cup snow peas, thinly sliced
2 cloves garlic, finely chopped
1 orange, segmented
1 teaspoon orange zest
3 cups cooked and cooled Jasmine rice
1 tablespoon light soy sauce

Remove the duck meat from the bones keeping the skin in tact. Save the bones to make stock.

Using a wok or cast iron skillet re-crisp the duck skin, if necessary. Set aside. If you are not crisping the skin put the duck meat in a pan to heat it before adding to the fried rice.

Add sesame oil to pan and heat until almost smoking. Pour the beaten eggs into the skillet or wok and move it around so it coats the bottom. Cook only until done making a very thin omelet. When fully cooked remove it to a cutting board and cut into thin strips. Set aside.

Stir fry green onions, snow peas and garlic for one minute. Add cold rice and heat through. Add chopped omelet, orange segments and zest. Stir fry for one minute. Add soy sauce and duck meat.  Serve immediately.


20.2.15

Chinese Hot and Sour Soup


This is one of my favourite authentic Chinese recipes. This is so easy to make. The surprise to me in this recipe is that the spiciness or heat comes from the white pepper that is added. I have always thought there was a sriachi or hot sauce. Nope, simply white pepper.

This recipe will come together much more smoothly if all the ingredients are chopped, measured and ready to add before beginning to cook. In French this is called mise en place, everything in its place. Chop, measure and line up the ingredients so you can focus on combining them in creating pure alchemy with this recipe for Hot and Sour Soup.

Many of the same ingredients are used over and over again in this cuisine. If you are a fan then it is worth building a pantry.


 Chinese Hot and Sour Soup

2/3 c. boneless pork loin, cut into 1/4 inch strips 
2 tsp. dark soy sauce
4 small Chinese dried shitake mushrooms
3/4 c. dried black fungus
1 1/2 tbsp. cornstarch
1/2 c. canned sliced bamboo shoots, cut lengthwise into 1/8 inch wide strips
2 tbsp. red wine vinegar
2 tbsp. rice vinegar, unseasoned
1 tbsp. light soy sauce
1 1/2 tsp. sugar
2 tbsp. vegetable oil for frying
4 c. using mushroom soaking liquid and sodium reduced chicken stock
3 to 4 oz. firm tofu, rinsed and drained, cut into 1/2 inch cubes
1 large egg
1 tsp. sesame oil
1 1/2 tsp. ground white pepper
2 tbsp. thinly sliced green onions
2 tbsp. fresh whole cilantro leaves
Toss pork with dark soy sauce until well coated. 

Soak shitake and black fungus in boiling hot water to cover, about 30 minutes.  Cut out and discard stems from shitakes, then squeeze excess liquid from caps and thinly slice. Squeeze liquid from black fungus. Trim any hard nubs. In another bowl, stir together 1/4 cup (60 mL) cooled mushroom soaking liquid with cornstarch and set aside.

Stir together vinegars, light soy sauce, sugar and salt. 

Heat a wok or heavy pan over high heat. Add vegetable oil and stir fry pork until it just changes colour, about one minute. Add shitake mushrooms, black fungus and bamboo shoots and stir fry one minute. 

Add stock and bring to a boil, then add tofu. Return to a boil and add vinegar mixture. Stir in cornstarch mixture and return to a boil. Liquid will thicken. Reduce heat to moderate and simmer one minute. 

Beat egg with a fork and add sesame oil. Add egg to soup in a thin stream, stirring slowly in one direction with a spoon. Stir in white pepper. Sprinkle with green onions and cilantro before serving.  Makes 6-8 first courses. (Adapted from Bruce Cost)

19.2.15

Sticky Rice with Chinese Sausage


Victoria on Vancouver Island is home to Canada’s oldest Chinatown established during the Gold Rush of the early 1850’s. It is the second oldest in North America. At its peak over 40,000 immigrants lived in a few square blocks in the city centre. To this day it remains a vibrant place to shop for Asian ingredients, vegetables, fish and meat.  

While I was in the city I joined Chef Heidi Fink on her culinary tour. Heidi is in her tenth year leading cooking enthusiasts through the grocery stores, restaurants and teashops and shares her wealth of knowledge of Oriental cuisine. 

Sticky rice is one of my favourite dim sum dishes. Usually it is wrapped in lotus leaves but I cannot find lotus leaves. I have actually had it served to me in a rice steamer in a Chinatown restaurant and this is how I am making it at home.

Cantonese sausage can be found in the freezer section of an Asian grocery.

Sticky Rice with Chinese Sausage 
These are usually found in lotus leaf packages but I can't find lotus leaves. I don't like the flavour of banana leaves so I just steam them in a parchment lined bamboo steamer.

1 1/4 c. short grain glutinous sweet rice
4 Chinese dried shitake mushrooms, also called black mushrooms
1 boneless, skinless chicken breast
1/4 tsp. salt
1 tbsp. Chinese rice wine or dry sherry
1 tsp. cornstarch
2 links Cantonese sweet sausage, also called lop cheong
1 clove garlic, peeled and chopped
1 tbsp. Chinese rice wine
1 tbsp. light soy sauce
1 tsp. dark soy
1 1/2 tsp. cornstarch dissolved in 1 tbsp. cold water
2 tbsp. vegetable oil for stir frying
1/4 tsp. Asian sesame oil
black pepper or white pepper, to taste

Cover rice with cold water and soak for one hour.  Then drain and steam in a bamboo steamer lined with cheesecloth.

Meanwhile, soak mushrooms in boiling hot water until softened, about 30 minutes. Cut out and discard stems, then squeeze excess liquid from caps and thinly slice caps. Save mushroom soaking liquid for another use.

Thinly slice green onions keeping pale green and white parts separate from dark green parts. Quarter sausage lengthwise and finely chop.

Heat wok or large heavy pan over high heat and add vegetable oil. Add mushrooms, sausage and pale green and white parts of green onions, stir fry one minute. Add rice and stir fry, breaking up any clumps, one minute. Add sesame oil, then add pepper and remaining green onions and stir fry until combined well.  Steam in a bamboo steamer lined with parchment paper for about 15 minutes. 

Makes 8-10 side dishes. (Adapted from Bruce Cost)

Chinese Pork and Chive Dumplings


In 2015 the lunar new year, Chinese New Year or Tet begins on February 15 and lasts for 15 days. The holiday is celebrated with the entire family enjoying restaurant and home feasts. 

Who doesn't love potstickers? These are one of the most popular appetizers in Chinatown. Now is the time to face the fear and make them at home. There are no ingredients that cannot be found in a modern day grocery store. Make it a party and get friends together to make a big batch. Freeze them and they are ready for an easy tapa or meal.

Pork and Chive Dumplings

The sauce
1/2 c. soy sauce 125 mL
1/2 c. black vinegar, also called sugarcane juice vinegar 125 mL
1 tbsp. sesame oil 15 mL
2 tsp. toasted white sesame seeds 10 mL

The filling
1 lb. ground pork
1 c. finely chopped garlic chives
2 tsp. minced garlic
1 tsp. salt
1 tsp. cornstarch
1 tsp. grated fresh ginger
1 tsp. freshly ground black pepper
one package 3 1/2-inch round dumpling wrappers
vegetable oil, for frying

Make the sauce by combining all ingredients and set aside until ready to serve. Makes about one cup.

Make the pork filling by combining all ingredients except for dumpling wrappers and vegetable oil.

Working with one dumpling wrapper at a time, place a tablespoon of pork filling in the center of the wrapper, moisten the edge of the wrapper and fold in half. Pinch the dumpling at one end and pinch as you go until you have a total of 6 pleats and the dumpling is closed. Place dumpling on a parchment lined baking sheet. Repeat with remaining dumpling wrappers until all filling has been used. Cover dumplings with a damp paper towel until ready to cook or at this point they can be frozen and cooked later.

In a large non-stick skillet, heat two tablespoons of oil over medium-high heat. Working in batches, arrange the dumplings in a single layer and cook, until the bottoms begin to brown, about one minute. Pour half cup water into the pan, cover with a lid and steam until the filling is almost cooked through, about 2 minutes. Uncover and cook, until the all the water has evaporated and the bottoms have become golden brown and crisp, about 2 minutes. Serve warm. 

8.12.14

Culinary Tour in Canada's Oldest Chinatown

The earliest immigrants from China started arriving in 1858 and by 1880 Victoria had the largest settlement in Canada. Gold is what brought them but as more and more arrived many established businesses to serve this thriving community.

If you are like me you have walked up and down the aisles of the grocery stores and baffled at the array of dried, canned and fresh foods many of which have no English labels. Enter Chef Heidi who has assisted hundreds of curious cooks over the past 10 years leading this tour. The groups are limited to six people which allows lots of opportunity for questions and personal assistance. Her knowledge of ingredients and even recommending certain brands is impressive. After all, we are often faced with too many choices.

A couple of words we learned as it relates to produce are 'moo' and 'sum'. Moo means baby, as in baby bok choy. Sum refers to a flowering vegetable such as Chinese broccoli.
If you like sticky rice as much as I do you have probably wondered "What is in that?" These sausages add amazing flavour. They must be steamed or boiled for about 15 minutes before using to soften them and render out fat. And you should see the bacon! I wish I had taken a picture. They use it as we would use lardons.
Many people are cautious of produce coming from China. The good news is that most of these are grown in California and make a short trip up the coast. Most items are labelled with country of origin.
Prices in Chinatown are much better than the chain grocery store. One reason is that they have a much smaller space. The aisles are narrow and crammed with product. The sidewalk is an extension of the store. There is no space wasted. Another reason for better prices is that they often purchase the 'ugly' vegetables. This is called #2 grade produce. This is a good thing for the planet. Regular grocery stores throw out a lot of produce because it doesn't conform to certain physical standards.
I had to make a pictorial note of these fermented black beans. I love homemade black bean sauce and this is the key ingredient.
Our tour wound up with tea tasting at Silk Road Tea Store. Honestly, there are too many choices again. I became enamoured with the lapsang souchong black tea. It is a pine smoked black tea that could have all sorts of applications in your kitchen. Thank heaven for the 20% discount. They also sell online which will make it all too easy for me to try a few more.

29.11.14

Victoria's Chinatown


I have travelled to many cities around the world and often I have been averse to tours but when it comes to localized community tours it is always worth the time. Today's Chinatown tour in Victoria, Canada was no exception. Our tour guide with Discovery Walks was excellent. Not only does he recognize a few strategic Chinese language symbols and knows the history inside out, he is working on a book about Victoria's Chinatown. I will be watching for this book release.

I only snapped a few pictures. Most of the time I was rapt by the descriptions of life as the earliest Chinese immigrants, not ever planning to stay, unravelled into the story of their migration and new home in Canada.

Offerings of fresh fruit.
Yes, Chinese immigrants did not come with a plan to relocate. Rather it was an opportunity to earn money to send home and eventually return home to an improved life. With the changes in politics at home it became less desirable to return to the old country and as a result many stayed. And eventually they did bring some family.

It is most disappointing to hear of the inequities in life that these immigrants experienced. Chinese people were not allowed to be architects and as a result the buildings were designed by mainly British architects. As a result the style is not true but seen through the lens of another culture. Apartheid in the schools was declared and revoked. To maintain a sense of their heritage a Chinese School was built and attended after regular school hours and on weekends. Classes are still held here to teach language and culture.

Ancient gong and bell were brought from China for this temple.
There were very few women in the early days of the Chinese migration. It was a settlement of men, many lured by the gold rush, hoping to make money and return home. Most came from a farming background and as a result founded many market gardens that fed not only the Chinese but the locals. Until as late as the 1960's food was delivered in the traditional Chinese way with a bamboo pole over the shoulders carrying baskets of produce on each end.

The tour was filled with real historical facts from the migration, family and school life, gambling houses, opium dens and sadly the disintegration of Chinatown. The city of Victoria has recognized this special historical aspect and is now restoring and redeveloping with a sensitivity to the past.

I loved burrowing into the narrow alleyways to see behind the store fronts. Today's development is mirroring the old days by reconstructing a vibrant culture behind the store facades. I knew about Fan Tan Alley but there are many more alleyways.
This is a picture of new development in the back alleys of modern day Chinatown. There are residential condos and business spaces on the ground level.

We visited the first and oldest Hakku temple in Canada founded in 1905. The Hakku are from northern China. Once again our tour guide painted a vivid picture of life around the temple, in the past and in today's life. Although the temple is not as important now in the day to day life of the Chinese it is important for family celebrations and maintaining a sense of history for the young.
The exterior is very unassuming. The temple is on the top floor. Rental apartments and meeting rooms occupy the rest of the space.
After all this walking I was ready for dim sum. Sorry, I didn't take any pictures but it was delicious.

19.4.14

Stir Fry Peppers and Asian Pork Tenderloin


This is a simple and healthy meal that can be made in less than 30 minutes. I have chosen brown basmati rice, a healthier choice than white rice. My way of cooking rice yields a light and fluffy grain. Boil in plenty of salted water until al dente. Strain through a calendar or sieve and lay a clean tea towel over the rice. Let it steam until the rest of the meal is ready. I use this method for all types of rice.

Asian Pork Tenderloin
1 large tenderloin about 1 1/2 pounds.
1/3 cup soy sauce
1/4 cup rice vinegar
3 tbsp. light brown sugar
2 medium cloves garlic, minced
1 1/2 tbsp. peeled and minced fresh ginger
1 tbsp. Asian chile sauce

Trim the pork of any silver skin. Cut on the diagonal into 1/2 inch thick medallions.
In a small bowl whisk together the soy sauce, 2 tablespoons of the vinegar, 2 tablespoons. of the brown sugar, the garlic, ginger, 1/2 tablespoons. sesame oil, and 2 tsp chile sauce.  Toss 1/2 cup of this mixture with the pork medallions in a large bowl; reserve the remaining mixture to use as a sauce.  Let the pork sit at room temperature for 15 minutes or refrigerate for up to 2 hours.

Heat 2 tablespoons canola oil in a heavy 12 inch skillet over medium high heat until shimmering hot.  Remove the pork from the marinade, shaking off the excess, and transfer the pork to a clean plate.  Discard the marinade.  Add half of the pork medallions to the skillet, spacing them evenly.  Cook them without touching until well browned, about 2 minutes.  Flip and cook until the pork is just cooked through, about 2 more minutes. 


 Stir Fry Peppers and Onions 

1 large onion
1 clove garlic
1 teaspoon minced fresh ginger
 2 large red or green peppers
2 teaspoons soy sauce
2 teaspoons rice vinegar
Freshly ground black pepper to taste
Slice onion thin; put garlic through press and mince ginger; stir fry in hot oil in large skillet for one minute.
Cut peppers in strips; add to skillet and stir fry about 5 minutes, until crisp-tender.
Add soy sauce, vinegar and pepper and cook another minute. Serves 3.


19.3.14

Lentil Wontons


This recipe is a keeper. Traditionally wontons and dumplings are made with pork and shrimp so I was worried about the intensities of flavours and the texture. Mushrooms have an earthy flavour and are meaty in texture. They were perfect. Any mushroom would work but sliced button mushrooms were on sale this week. I added wild foraged dried Saskatchewan Matsusake mushrooms. Shitakes would be another good choice. I fully cooked the lentils and they held their shape well. They had a nice firm texture in the finished wonton.

These work equally well as potstickers served with a soy dipping sauce or as wontons in a mushroom broth for a vegetarian version of wonton soup.

This is my entry for the recipe contest with Canadian Lentils. I call it my wild card entry because it doesn't fit into any category. Yes, there is a category for that. Click on this link to find all the entries on Facebook. Remember to 'like' my entry to help me win. Comments are nice, too.

Don't be put off by the number of ingredients. Many are always in your kitchen already. There are a lot of veggies which is a good thing. And like with all recipes, just adapt it to your liking. Skipping water chestnuts, for example, will not make this any less appealing.

 Lentil Wontons

1 tbsp. fresh ginger, finely chopped
1-2 cloves garlic, minced
4 green onions, finely chopped
1 c. green lentils, cooked
1 oz. dried wild mushrooms
1 lb. button mushrooms, sliced
1 - 227 mL can water chestnuts, coarsely chopped
2 chard leaves, ribs removed chiffonade
1/2 c. yellow onion, finely chopped
1 carrot, finely shredded
2 tbsp. cornstarch
pinch of white sugar
1 tsp. sesame oil
2 tbsp. vegetable oil
1 tsp. sea salt
2 tbsp. soy sauce
1 tbsp. rice wine
salt and white pepper, to taste
wonton wrappers

Wash lentils and cook in ample water for 30 minutes or 10 minutes in a pressure cooker.

Saute yellow onion in vegetable oil until soft but not browned. Put in a medium sized bowl. In the same pan saute mushrooms until soft. Chop finely in food processor and add to onions in bowl. Meanwhile soak dried mushrooms in 1 cup hot water for 20 minutes. Drain and reserve liquid. Finely chop. Add wild mushrooms, fresh ginger, green onion, chard, lentils, water chestnuts, carrot and garlic to bowl. Add sesame oil, rice wine, soy sauce, salt, pepper and cornstarch.


Place a scant teaspoon of the mixture on a wonton wrapper and fold as desired. Round or square wonton wraps can be used. Wet the edge of the wrap and pinch the edges together to seal. I had square shaped wraps in my freezer. Makes approximately 50 wontons.


At this point the wontons can be laid on a parchment lined baking sheet and frozen, then stored in a freezer bag or they can used right away.

For potstickers, fry quickly in a hot pan with vegetable oil until browned. Turn over, add water and cover to finish cooking. The dough should shrink around the filling. Serve with dipping sauce.

These can also simply be boiled and served with dipping sauce.

Dipping Sauce
4 tbsp. soy sauce
1/2 tsp. sesame oil
1 tsp. rice vinegar
1 tsp. finely minced fresh ginger


Wonton Soup

Mushroom Stock
1 large yellow onion, sliced
2 medium carrots, chopped
1 stalk celery, roughly chopped
1/2 lb. white mushrooms, sliced
1 oz. dried shitake mushrooms
2 cloves garlic, smashed, skin left on
bouquet garni of thyme, oregano, bay leaf and black peppercorns

Cook all ingredients in a stockpot with 10 cups of water for 45 minutes without the lid. Strain and discard solids. Use stock to make soup with ingredients below.

wontons
2 chard leaves
finely chopped green onions
1/2 tsp. sesame oil
soy sauce, to taste
salt and white pepper, to taste

Season stock with soy sauce, sesame oil, salt and pepper. Add wontons and simmer until tender Add chopped chard leaves to hot stock.  Serve. Garnish with chopped green onions, if desired.


19.11.13

The Ultimate Asian Inspired Flank Steak


Quality ingredients and simplistic preparation create delicious results. Isn't that what you look for when you eat out at fine restaurants?

This dish begins with quality beef. The flank is a less tender cut. Usually this would mean a long and slow cooking time but if properly cut this steak is beautiful when cooked to medium rare.

The flavour of the less tender cuts is full and delicious. Flank stands up well to the bold flavours of black bean sauce and balsamic vinegar. Sweeten this with honey and add the aromatics of orange zest, fresh ginger and garlic. Add more flavour with searing the meat and then cooking slowly until to desired doneness.

Serve with jasmine rice and stirfried bok choy for a complete meal.

Asian Flank Steak

1 ( 1 1/2- to 2-pound) flank steak
1/4 cup low sodium soy sauce
1/4 cup balsamic vinegar
1/2 cup vegetable oil
3 tablespoons honey
1 large and fresh clove of garlic, minced
2 tablespoons minced  ginger, minced
3 green onions, thinly sliced
1 tablespoon black bean sauce
zest of one orange


Mix honey and vegetable oil over low heat until the honey is melted. Add the rest of the ingredients except the steak. Stir to mix. Use a large enough pan or a resealable plastic bag in a large bowl. Add the steak to the bag, flipping it to coat it in the marinade, and then seal the plastic bag.
Place the steak in the fridge and marinate it overnight, or for a minimum of 10 hours. To speed up the process, this can be marinated at room temperature for 2 - 3 hours.

When ready to cook, remove the steak from the marinade and preheat your cooking surface. A grill or stovetop grill pan are ideal. Sear the steak on each side until it's cooked to your desired degree of doneness. Let the steak rest for 5 minutes and then slice it against the grain and serve.

Strain the marinade and return the liquid to the pan. Reduce to half and use as a sauce with the steak.

14.11.13

Pork Tenderloin with Black Bean Sauce

I am all for scratch cooking. In fact that is almost what I always do. But every once in awhile you come across a sauce or seasoning mix that you will just never make from scratch. That is how I feel about this artisanal black bean sauce.

I am still on a black bean binge using my wonderful sauce. I read the label to find the business name of the product. It was in very small print. The ingredients were all natural and even before opened, refrigeration was recommended. There is no sugar, no salt, no preservatives. It is the real deal.

When I lived in Calgary I found a little Chinese restaurant that made and sold their own black bean sauce. After a few years they discontinued production and I have not used black bean sauce since. The mass produced version in the grocery store does not even come close to the flavour of small batch. 
I researched the Ying Ying Soy Food and found a family business using certified non-GMO organic soybeans grown in Ontario close to their factory in Oakville. They describe themselves as 'family business making artisan tofu'. They make small batch tofu in the traditional way using nigaru as the coagulant rather than calcium sulfate in the modern mass production. 

The only information I could find on the black bean sauce was right on the label. After reading everything about them, I am so happy to have crossed paths. Their products are sold widely throughout Toronto and London, Ontario. The rest of us just have to find a friend to bring some home.

I am so fortunate to have Pine View Farms all natural pork tenderloin in my freezer. To use anything less with this artisanal black bean sauce just wouldn't be right.

Pork Tenderloin with Black Bean Sauce

1 Pine View Farms pork tenderloin
2 tbsp. Ying Ying Soy Food black bean sauce
1 tbsp. oil such as sunflower, canola or corn

Prepare your tenderloin by removing the silverskin. This is a very tough tissue that will not soften with cooking. A sharp boning knife is ideal but any sharp knife will work.

Position the tip of a boning knife about 1/2 to 1 inch from one end of the visible silverskin. Push the tip under a strip of silverskin about 1/2 to 3/4 inch wide. Angle the knife slightly up toward the silverskin as you slide the knife down the tenderloin, freeing the silverskin. Use your free hand to hold the silverskin taut as you cut. If your knife isn't extremely sharp, you may need to use a slight sawing motion to work down the tenderloin. Once you've cut all the way through the end of the strip, turn the knife around and cut off the end that's still attached. Repeat until all the silverskin is gone. (From Fine Cooking).


A tip with pork tenderloin - this cut tapers making one end much thinner than the rest. This will cook more quickly and easily over cook. Just fold it back and tie with cooking string so the tenderloin is the same thickness throughout.

Preheat a cast iron pan on medium low heat and add oil. Season tenderloin with sea salt and freshly ground black pepper. Place in pan and sear on all sides. Turn heat to low. Baste the tenderloin with the black bean sauce and continue cooking until meat reaches an internal temperature of about 150 F. Remove from pan, place on cutting board and tent with foil. The meat will continue to cook. 160 F is the perfect internal temperature for medium rare. Rest for 10 minutes and serve.


22.2.13

Casual Friday - The Chinese Takeout Cookbook

 Okay, so I have two Casual Friday posts this week! I had to get this recipe posted by February 24 to qualify for prizes. I forgot until this morning. Call it a bonus!

Oops! I just reread the rules and they won't ship any prizes outside the U.S. I guess I'll have to buy the book!

This cookbook is hitting all the papers right now and looks downright interesting. I have been following her blog, Appetite for China for quite some time now. Until this little push, I have to say that I have been intimidated to make any of her recipes. Now I might win some nice prizes if I participate in their virtual Chinese New Year dinner. This is the recipe I have chosen.

This is such a simple and tasty salad to make. I liked all the options if we were not able to find the ingredients locally. And I did have to use spaghetti. It was great. I had to use tahini with sesame oil rather than Chinese sesame paste and sriachi rather than chili paste. I had Szechuan peppers and used just a touch. This had just the right amount of heat. I can see making this salad with peas or snap peas and even kernel corn. Next time I would cut my carrots and cucumbers smaller.

Cold Sesame Noodles   adapted from The Chinese Takeout Cookbook
Serves 4 as a main or 6 as an appetizer
  • 12 ounces dried spaghetti or Chinese egg noodles
  • 2 tablespoons peanut oil
  • 2 teaspoons minced garlic
  • 2 teaspoons grated ginger
  • 1 cucumber, peeled and julienned
  • 2 carrot, peeled and julienned
  • 2 teaspoons white sesame seeds
  • 2 scallions, green parts only, thinly sliced
Sauce:
  • 3 tablespoons Chinese sesame paste (or 3 tablespoons tahini with an extra teaspoon of sesame oil)
  • 2 tablespoons smooth peanut butter
  • 2 tablespoons soy sauce
  • 1 tablespoon sesame oil
  • 2 tablespoons Chinese rice vinegar
  • 2 teaspoons chili paste
  • 2 tablespoons sugar
  • ½ teaspoon ground Sichuan pepper (optional)
  1. Bring a pot of water to boil and cook egg noodles or spaghetti until al dente, or the minimum amount of time according to package instructions. Drain immediately, rinse with cold water, and drain again. Toss with 1 tablespoon of the peanut oil and set aside.
  2. Heat the other tablespoon of peanut oil in a small pan over medium heat. Gently cook the minced garlic and grated ginger until just fragrant, about 30 to 40 seconds. Remove from the heat and set aside.
  3. Prepare the sauce: In a medium bowl, combine the sesame paste, peanut butter, soy sauce, sesame oil, rice vinegar, chili paste, sugar, and optional Sichuan pepper. Add 3 tablespoons of water and whisk until the mixture is smooth. Stir in the cooked garlic and ginger.
  4. Pour the sauce over the noodles, add the cucumbers and carrots, and toss. Transfer to large bowl or deep serving dish and sprinkle the sesame seeds and scallions on top. You can serve the sesame noodles at room temperature or chill in the fridge for 1 to 2 hours before serving.
Notes: Leftovers will keep in the fridge for up to 3 or 4 days.

16.11.10

Peking Duck with Pancakes and Hoisin Sauce

What do I do when my contractor is a "no show"?  I am stressed to the gills because my 
kitchen cabinets are sitting in my cabinet maker's workshop, my appliances are ready 
to be delivered, the hardwood is sitting in one of my bedrooms and I have moved to 
my basement?   I am back to square one with a new contractor who already has a full 
schedule.  So here I am, making Peking Duck.  I have sold my old stove but they don't
take it for another two weeks.  I have always wanted to make Peking Duck.  I am, 
destressing again, by cooking.

I have a lot to learn about making Peking Duck but it was still tasty.


Peking Duck Recipe

Ingredients :
2.5 kg
40 pieces
6
1/2
2
Coating
1 tablespoon
1  teaspoon
1/2 teaspoon
Sauce
2 tablespoons
1 tablespoon
1 tablespoon
1 tablespoon
Duck
Chinese pancake 
Spring onions (scallions)
Cucumber, sliced
Red chilies
Malt sugar, honey or molasses
Cornflour
Vinegar
Hoisin sauce
Peanut butter
Sesame oil
Chinese yellow wine
Method :
  • Clean the duck, removing and discarding any excess fat in the cavity.
  • Tie a piece of string around its neck. Pat dry.
  • Bring 25 cups of water to the boil and turn off the heat.
  • Put the duck into the water and turn it backwards and forwards for about 1 minute. 
    Remove.
  • Bring the water to the boil again and repeat the previous step.
  • Do this twice more (total four times).
  • Hang the duck in a cool, draughty place for about 5 hours.  My duck didn't have a neck so I couldn't hang it.  I thought it was a brilliant idea to put it on my beer can chicken stand.  Since it is winter, I placed it in front of a slightly opened window.
  • Mix the coating ingredients with 10 tablespoons hot water and brush the duck all over with the mixture.  I used sorghum, because it was what I had on hand.
  • Hang to dry for a further 4 hours and apply a second layer of coating.
  • Pre-heat the oven to 450oF  and put a roasting pan in the oven with a wire rack in it, making sure that there is a space of about 5 cm between the rack and the pan base.  Be sure the rack is fully preheated.
  • Place the duck on the rack, breast side up, and roast for 8 minutes.
  • Turn the duck over using a towel, not a fork, and roast for a further 8 minutes.
  • Reduce the temperature to 350oF and turn the duck breast side up again.
  • Roast for 20 minutes. Lower the temperature to 250oF and roast for 10 minutes.
  • Increase the heat again to 450oF and roast the duck for about 10 minutes.
  • At this point you have to watch carefully to make sure the skin of the duck does not burn.
  • Turn off the heat once the skin has turned a rich deep red.
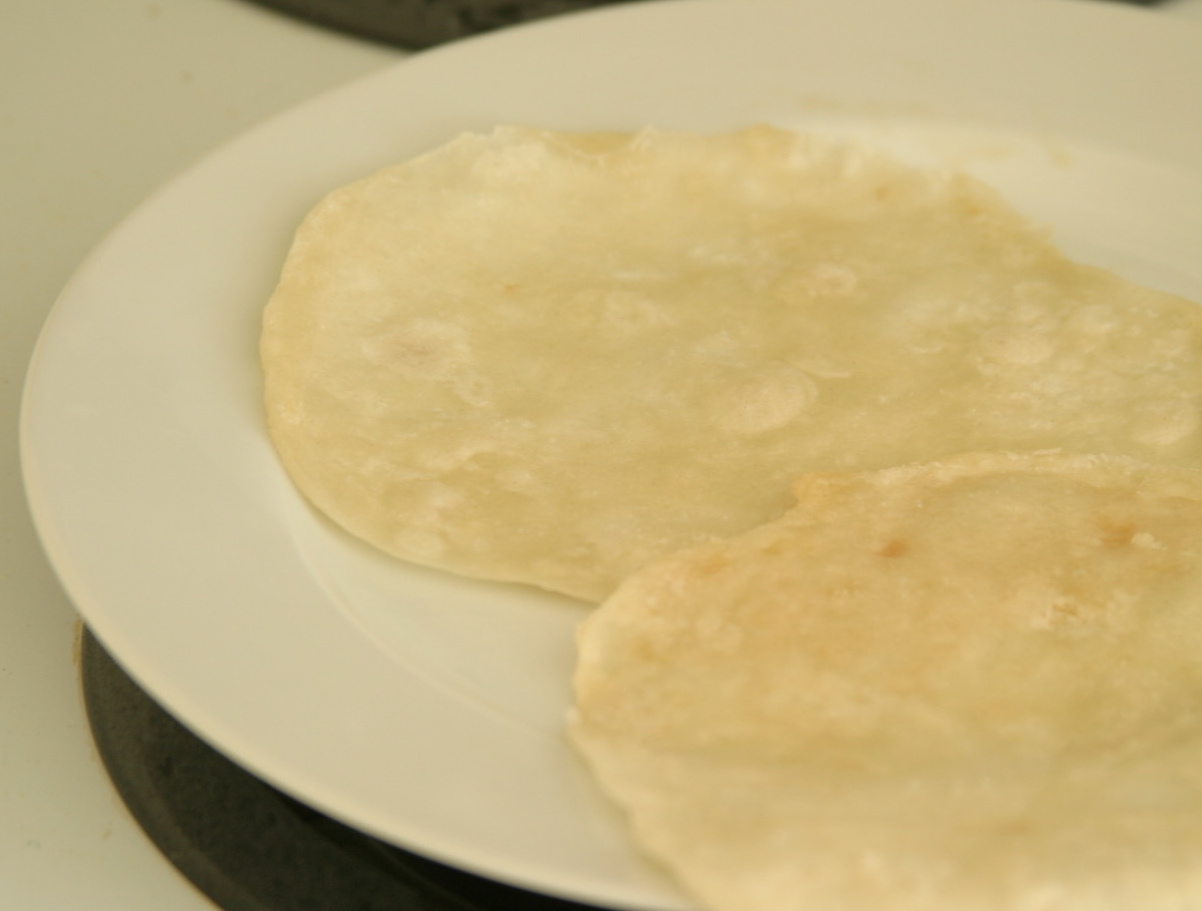
  • While the duck is roasting, prepare the Chinese pancakes. 
  • Cut the spring onions into 5 cm lengths, shred the tip of each piece and put it in
    iced water for 10 minutes. Cut the cucumber into similar lengths.
  • Decorate each piece with a red chili ring.
  • Blend together the sauce ingredients over a low heat.
  • Carve off the skin on the back of the duck.
  • Hold the knife horizontally and carve the skin and meat from the breast and legs, 
    cutting at an angle of 15o.
  • Arrange the skin and meat on a large plate and serve it with pancakes and cucumber, spring onions and the sauce.
Note : Diners help themselves. They place one pancake flat on a plate, put a piece of duck in the center, dip a spring onion (scallion) in the sauce and put it on top of the duck, wrap it up and eat it. The contrast of textures and taste is delicious.

 Ingredients : (makes about 40 pancakes)
4 cups
1 1/2 cups
1 tablespoon
Plain flour (all-purpose flour)
Boiling water
Sesame oil
Method :
  • Place the un-sifted flour in a mixing bowl.
  • Make a well in the center and add the boiling water, stirring rapidly with a fork.
  • Knead the dough well on a lightly floured surface until it is smooth and firm.
  • Return the dough to the mixing bowl, cover and leave to stand for 1 hour.
  • Knead the dough briefly on a lightly floured surface and roll into a sausage 4 cm in diameter.
  • Pull it apart with your fingers to make about 40 equal sized pieces.
  • Roll the pieces between your hands to make smooth balls, making sure that they are all 
    the same size.
  • Lightly oil the fingers and palms of your hands and flatten each ball until it is 5 mm thick.
  • Brush the top with sesame oil.
  • Place one piece of dough on top of another, oiled sides facing, and roll out into a pancake 
    about 15 cm across.
  • Heat the frying pan and brush the bottom with sesame oil.
  • Add the paired pancakes to the skillet one at a time.
  • Cook over a medium heat for 30 seconds, turn and cook the other side for 30 seconds.
  • Pull the paired pancakes apart with your fingers to make two thin pancakes.
  • Place them on a large piece of foil, one on top of the other, oiled side up.
  • Wrap them in the foil and steam for 30 minutes.
  • Any pancakes left over can be wrapped 
    in foil and kept in the refrigerator for up 
    to three days.